前言
在 iOS 开发中,有这样一个场景:某件重要的事情必须立刻让用户知道,甚至不惜以打断用户当前操作为代价来强调这份重要性。这就是通知(Notifiations)。目前常用的框架为 UserNotifications,它主要用来在锁屏和应用界面通过弹窗来显示通知。另一个框架是 Notification Center ,以它实现的跨 object 通知以及原生的 KVO(Key-Value-Observing) 是 iOS 中观察者模式的主要实现手段。
本文内容:
- UserNotifications 介绍
- 本地通知(Local Notifications)
- 远程通知(Remote Notifications)
- 观察者模式(Observer Pattern)
UserNotifications 介绍
UserNotifications 是 iOS 10 刚刚引入的全新框架。与以往版本的本地通知和远程通知分别处理不同,这次苹果把两者的 API 统一。从此以后,无论处理本地通知还是远程通知,都是用 UserNotifications 框架。
UserNotifications 的流程也十分简单,主要分以下 4 步:

- 注册
通过调用 requestAuthorization 这个方法,通知中心会向用户发送通知许可请求。在弹出的 Alert 中点击同意,即可完成注册。
- 创建
如果是本地推送,则在 AppDelegate 中设置推送参数;如果是远程推送,则无需设置参数,推送的内容和触发时间都在远程服务器端配置。
- 推送
这一步就是系统或者远程服务器推送通知。伴随着一声清脆的响声(或自定义的声音),通知对应的UI显示到手机界面的过程。
- 响应
当用户看到通知后,点击进去会有相应的响应选项。如下图:
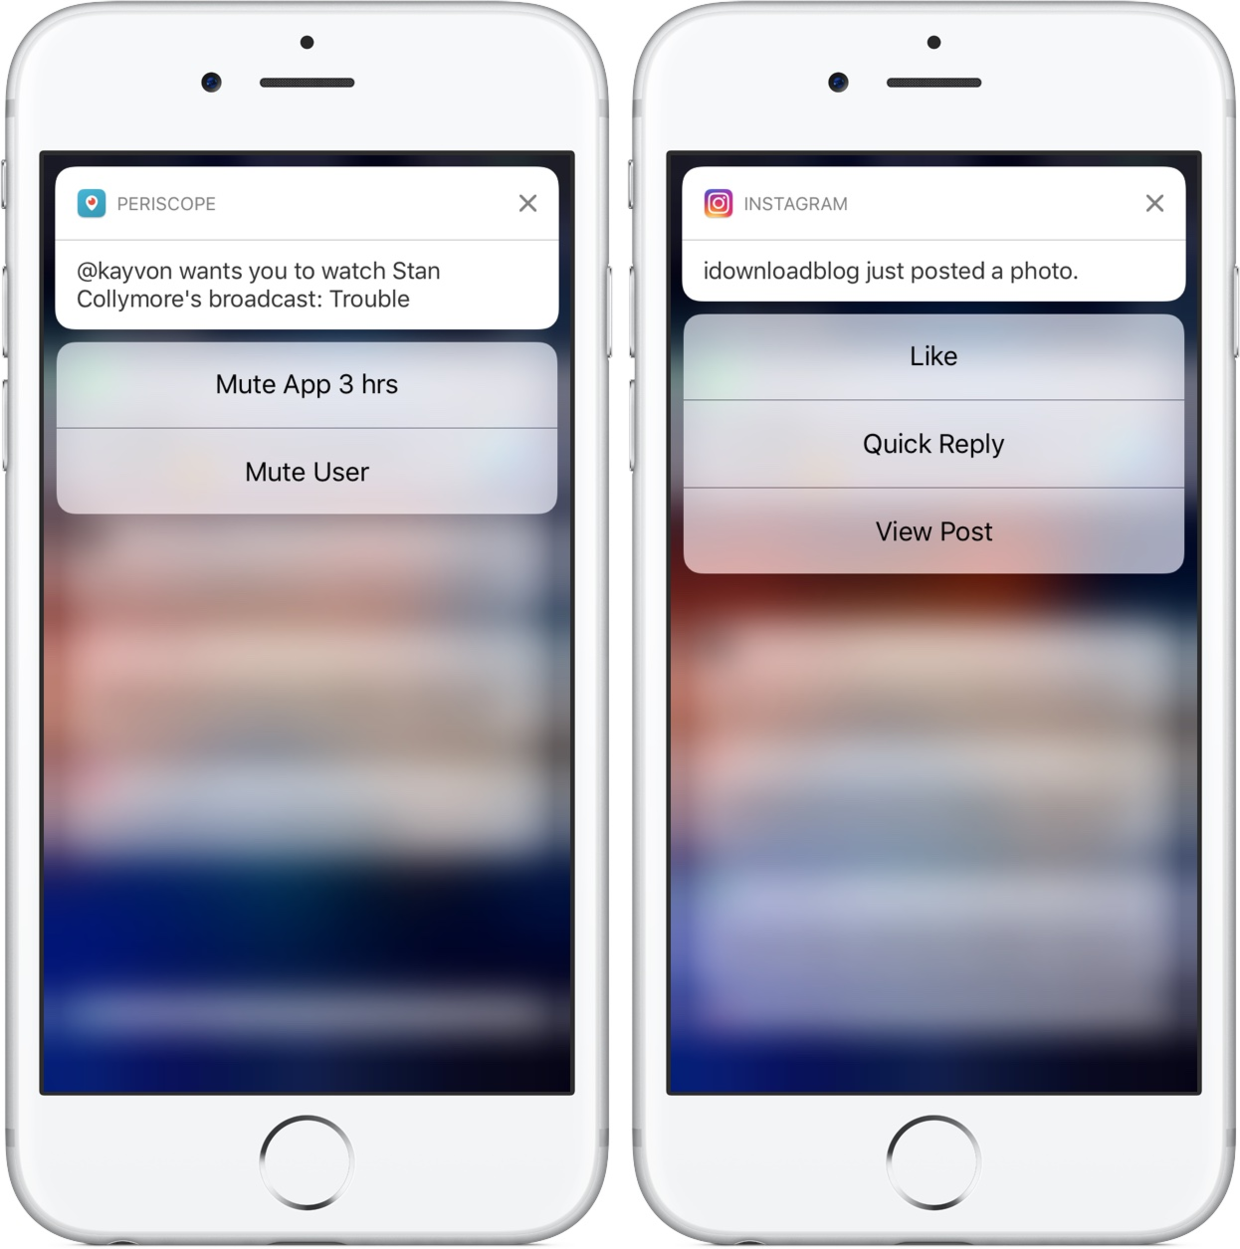
例如 Instagram 这个 App ,用户看到它的通知后有3个选项:一是 Like , 点击之后就是给你朋友的照片点赞;另一个是 Quick Reply,点击之后可以评论照片;最后是 View Post,点击之后是进入 Instagram 主 App 进行照片浏览。用户不同的选择决定了之后的操作,笔者称这个过程是对 Notification 的响应。
本地通知
因为通知是针对整个 App 级别的功能,所以一般在 AppDelegate 中完成注册和创建的过程。代码如下:
1
2
3
4
5
6
7
8
9
10
11
12
13
14
15
16
17
18
19
20
21
22
23
24
25
26
27
28
29
30
31
32
/// 注册
UNUserNotificationCenter.current().requestAuthorization(options: [.alert, .sound, .badge]) { accepted, error in
  if !accepted {
    print("Notification access denied.")
  }
}

/// 创建
func scheduleNotification(at date: Date) {
  /// 触发机制
  let calendar = Calendar(identifier: .gregorian)
  let components = calendar.dateComponents(in: .current, from: date)
  let newComponents = DateComponents(calendar: calendar, timeZone: .current, month: components.month, day: components.day, hour: components.hour, minute: components.minute)
  let trigger = UNCalendarNotificationTrigger(dateMatching: newComponents, repeats: false)

  /// 通知内容
  let content = UNMutableNotificationContent()
  content.title = "Tutorial Reminder"
  content.body = "Just a reminder to read your tutorial over at Soapyigu's Swift30Projects!"
  content.sound = UNNotificationSound.default()

  /// 传入参数
  let request = UNNotificationRequest(identifier: "textNotification", content: content, trigger: trigger)

  /// 将创建好的通知传入通知中心
  UNUserNotificationCenter.current().removeAllPendingNotificationRequests()
  UNUserNotificationCenter.current().add(request) { error in
    if let error = error {
      print("Uh oh! We had an error: \(error)")
    }
  }
}
在创建过程中,有以下几点值得注意:
触发机制。如果是时间触发,就用 UNCalendarNotificationTrigger;如果是地点触发,就用 UNLocationNotificationTrigger。
通知内容。除了标题(title)、内容(body)、声音(sound)外,还可以添加副标题(subTitle)甚至是图片。添加图片的示例代码如下:
1
2
3
4
5
6
7
8
9
10
11
12
13
14
15
16
17
/// 将图片添加到通知中
if let path = Bundle.main.path(forResource: "Swift", ofType: "png") {

  /// 通过本地图片 Swift.png 的路径创建 URL
  let url = URL(fileURLWithPath: path)

  do {
    let attachment = try UNNotificationAttachment(identifier: "Swift", url: url, options: nil)

    /// 设置内容的附件,将图片传入
    /// 你可以传多个图片进入,但只会显示第一个图片
    /// 当然你也可以根据不同情况显示不同图片
    content.attachments = [attachment]
  } catch {
    print("The attachment was not loaded.")
  }
}
Identifier。一个 App 可能有多种本地通知,它们之间是通过 Identifier 进行区分的。
将创建好的通知传入通知中心。多个 Notifications 之间有先后顺序,它们排成队列在通知中心中。这里我们为了方便演示,删除了以前所有的通知。
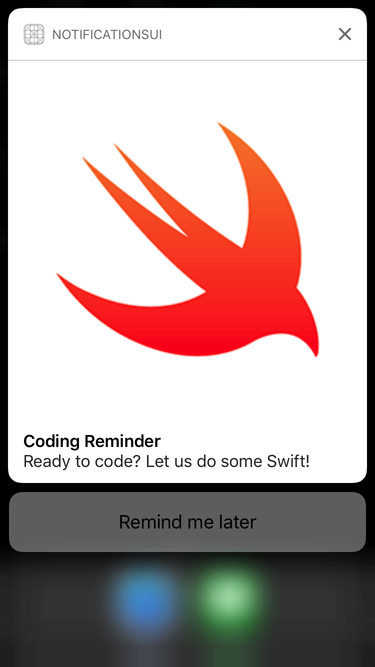
完成了注册和创建,我们只要在合适的时间让系统推送通知即可。代码中表现为在某个时间点调用scheduleNotification(date)。之后我们就可以看到相应的通知弹出:
一般情况下用户会点击通知直接进入 App 查看。假如要实现在通知出现时快速操作,比如过10分钟再提醒我这样的选项,我们又该怎么做呢?这时候我们引入UNNotificationAction 和 UNNotificationCategory。
UNNotificationAction: 响应通知的单个具体操作。例如直接给相关推送信息点赞。
UNNotificationCategory: 响应操作对应的类别。相当于是多个 UNNotificationAction 构成的群组,表明一类响应操作。
下面一段代码就是创立了一个 “Remind me later” 的 UNNotificationAction 响应操作,并将其加入到 “normal” 的 UNNotificationCategory 类别之中。
1
2
3
let action = UNNotificationAction(identifier: "remindLater", title: "Remind me later", options: [])
let category = UNNotificationCategory(identifier: "normal", actions: [action], intentIdentifiers: [], options: [])
    UNUserNotificationCenter.current().setNotificationCategories([category])
有了上面代码,当用户点击通知,我们就能看到相应的快捷操作。那么用户点击 “Remind me later” ,我们该如何在 App 中设置对应的操作,让系统在10分钟后再次推送响应通知呢?
很简单,我们只要在 UNUserNotificationCenterDelegate 协议中实现userNotificationCenter(_:didReceive:withCompletionHandler:) 。当用户点击通知选项时,这个方法自动被调用。这里我们通过 identifier 来判断具体是哪一个选项被点击,再调用对应响应方法即可。
1
2
3
4
5
6
7
8
extension AppDelegate: UNUserNotificationCenterDelegate {
  func userNotificationCenter(_ center: UNUserNotificationCenter, didReceive response: UNNotificationResponse, withCompletionHandler completionHandler: @escaping () -> Void) {
    if response.actionIdentifier == "remindLater" {
      let newDate = Date(timeInterval: 600, since: Date())
      scheduleNotification(at: newDate)
    }
  }
}
远程通知
再接触远程代码的具体实现之前,我们先来看看远程通知的原理:
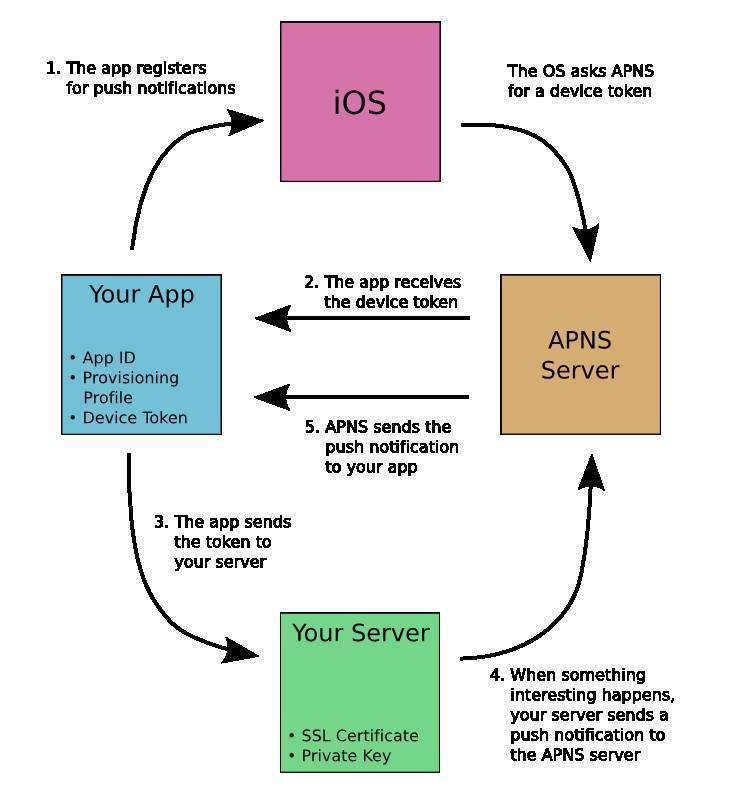
1.App 向 iOS 系统申请推送权限
2.iOS 系统向 APNs(Apple Push Notification Service) 请求手机 device token,并告诉 App,能接受推送的通知。
- 3.App 将手机的 device token 传给后端
- 4.后端向 APNs 推送通知
- 5.APNs 将响应通知推送给响应手机
从以上流程我们可以看出,APNs 在这里启动了监管者和托管者的作用,无论是请求还是推送都要经过 APNs。也就是说,所有的推送都必须按照 APNs 的游戏规则来。
有人到这里要问了,所有推送都指望 APNs,那流量那么大,APNs 崩了怎么办?
这确实是这个系统的一个弊端,就是耦合度太高,过于指望 APNs 很容易造成单点故障。所以,苹果在 iOS 10 以前,对于远程通知的内容,做了以下限制:
就是说,最多传 2 KB 通知。这样即使 1 秒钟内有 100 万个远程推送同时发生,也就 2 GB。这对于一个大公司来说毫无压力。
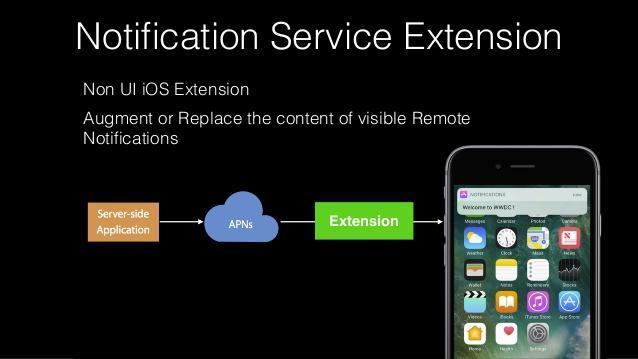
后来在 iOS 10 中,苹果引入了 Notification Content Extension 和 Notification Service Extension,这时候就可以修改原来的 notification 内容了,比如添加多媒体文件之类。讲这两个 extension 的文章太多,笔者这里不作赘述,只提供以下原理图一张。
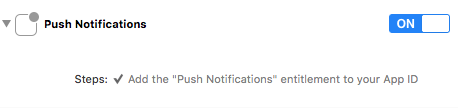
下面我们来看下具体怎么实现。远程推送与本地推送不同在于,在注册通知前,先要设置 App 使其允许远程通知。具体做法就是去 App Settings -> Capabilities -> Push Notifications,打开 Push Notificaitons。
接着就是老步骤注册。注意不同的是这次要说明是远程通知。代码如下:
1
2
3
4
5
6
7
UNUserNotificationCenter.current().requestAuthorization(options: [.alert, .sound, .badge]) { accepted, error in
  if !accepted {
    print("Notification access denied.")
  }
}
/// 注册远程通知,此处与本地通知不同
application.registerForRemoteNotifications()
远程通知的内容由远程服务器决定,本地无需创建。服务器端需要以下几个关键数据来确认对指定的手机进行推送:
- Device Token: APNs 用来确认究竟是哪台机器,哪个 App的参数。它可以通过以下代码获取。
1
2
3
4
5
6
func application(_ application: UIApplication, didRegisterForRemoteNotificationsWithDeviceToken deviceToken: Data) {
    /// 将 device token 转化为字符串
    let deviceTokenString = deviceToken.reduce("", {$0 + String(format: "%02X", $1)})
    /// 将 device token 打印到 console 里面
    print("APNs device token: \(deviceTokenString)
}
开发 App 的正确做法是把 Device Token 发送到服务器端,这里为了演示方便,就直接打印出来了。Device Token 大概长下面这样:
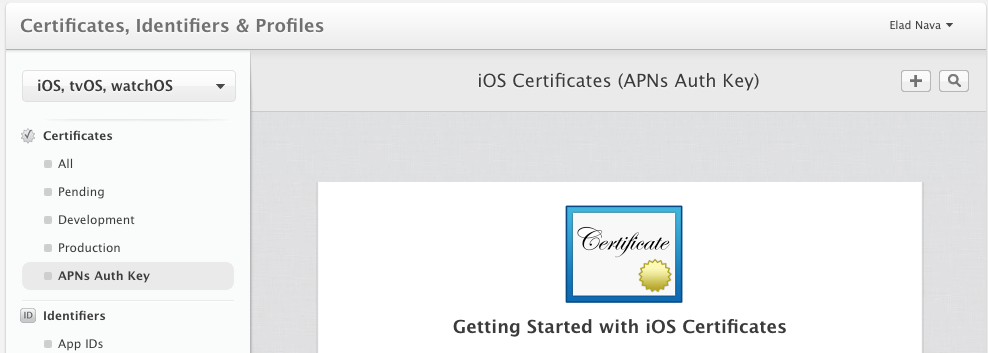
- Key ID: 后台服务器发送通知时, APNs 对其的认证号码。它需要你去开发者中心注册 APNs Auth Key。它会产生一个 .p8 文件,Key ID 就在其中。
- Team ID: 你 Apple ID 对应的号码。可以在 App Settings -> Bundle Identifier 里找到。
这样服务器就可以向你的手机发送通知了。加入响应操作,同样是借助UNNotificationAction 和 UNNotificationCategory ,并调用userNotificationCenter(_:didReceive:withCompletionHandler:),与本地推送的响应处理是一模一样的。
观察者模式
观察者模式是设计模式中的一种,就是说一个对象当自身某些状态发生变化的时候,自身发生相应操作或通知给另一个对象。对象之间无需有直接或间接的关系。这种设计模式的最大的好处是在于解耦。因为两个对象可以分别单独设计,只需在特定情况下通知对方即可。
下面请看一道面试题:请自行设计 Swift 的 Notification API,使其能够实现 iOS 中的观察者模式。
拿到这道题目,我们首先要分析 Notification API 对于观察者模型的使用场景,无非就是两种:跨 object 通知,以及 KVO(Key-Value-Observing)。
跨 object 通知以及 NotificationCenter 设计
首先我们来看跨 object 通知。一个最简单的应用场景,当一个 ViewController 初始化时,它要通知 Network 部分去下载相应的图片以填充对应的 UIImageView。所以流程如下:
- Network 注册观察 ViewController 初始化行为
- ViewController 发生初始化行为,并发出相应通知
- Network 得到通知,观察到 ViewController 行为的发生
- Network 根据通知,调用 downloadImage 方法
根据以上流程,我们发现这种逻辑是 objects 之间的信号传递和接收过程。比较好的设计方法是单独设计一个 Notification 类别,它相当于是一个通知调度中心,处理任意 objects 之间的通知,而不影响 objects 本身的其他操作。所以我们设计出了 NotificationCenter 这个类别,它有这两个操作:
1
2
3
4
5
6
7
8
9
10
11
12
13
14
15
16
17
class NotificationCenter {

  /* 注册观察
   * observer:说明谁是观察者,此例中是 Network
   * selector:通知发生后观察者调用方法,此例中为 func downloadImage(url)
   * notificationName:通知名称,用来识别具体通知
   * object:信息发送者,如果为 nil 则表示任何发送者信息都接受,此例中为 ViewController
   */
  func add(observer: Any, selector: Selector, notificationName: String, object: Any?)

  /* 发送通知
   * notificationName:通知名称,用来识别具体通知,与上面的注册观察对应
   * object:信息发送者,此例中为 ViewController
   * userInfo:提供给观察者的信息,此例中为需要下载图片的 URL,以及对应的ImageView
   */
  func post(notificationName: String, object: Any? , userInfo:[AnyHashable : Any]? = nil)
}
由于是跨 object 之间的通知,所以可知此类通知具有一般性,故而 NotificationCenter 设计为单例比较好:
1
class var default: NotificationCenter { get }
最后还要注意一个问题,就是当观察者被回收的时候,我们一定要撤销观察,否则会发生通知发向一个 nil 类的情况,导致 App 崩溃。于是我们这样设计:
1
func remove(observer: Any)
然后将它添加在类 deinit 中:
1
2
3
deinit {
  remove(observer: self)
}
貌似我们已经设计好了针对跨 object 的最简单 API。对照一下 Apple 官方的 NotificationCenter API,发现确实也是这个思路。不过他们设计的更全面可靠,这里大家可以自行比较。
KVO
我们来看第二个情况,就是 KVO – 键值观察。
顾名思义,键值观察就是说当某个属性发生变化,其对应的值也发生变化。它一般用于单个 object 内部的情况。举个具体的例子,ViewController 一开始 UIImageView 没有图片的时候,我们用 activityIndicator 显示加载状态,当 Network 下载好图片并给 UIImageView 赋值之后,我们停止 activityIndicator 的加载状态。也就是说我们观察 image 这个属性,当它由 nil 变成非 nil 时,程序作出关闭 activityIndicator 动画的相应操作
所以基本流程如下:
- ViewController 给 UIImageView 添加 activityIndicator,启动动画效果
- ViewController 观察 UIImageView 的 image 属性
- ViewController 通过上面提到的跨 object 通知,从 Network 里下载 image,并给 UIImageView 赋值
- ViewController 观察到 UIImageView 的 image 属性已经被赋值,所以启动相应方法,关闭 activityIndicator 的动画
这里我们可以看出来,这是针对单个 object 的某个属性变化而设计出来的通知框架。所以我们不妨用 extension 的形式对 NSObject 添加通知方法。
1
2
3
4
5
6
7
8
9
10
11
12
13
14
15
16
17
extension NSObject {
/* 注册观察
* observer:说明谁是观察者,此例中是 UIImageView
* property: 指出被观察的属性,此例中是 UIImageView 中的 image
* options:通知中应该传递的信息,比如 UIImageView 中新的 image 信息
*/
func addObserver(observer: NSObject, property: String, options: ObservingOptions)
/* 响应观察
* property: 指出被观察的属性,此例中是 UIImageView 中的 image
* object: 观察属性对应的 object,此例中是 UIImageView
* change: 表明属性的相应变化,如果表示任何变化都可以接受,可以传入 nil
*/
func observeValue(forProperty property: String,
ofObject object: Any,
change: [NSKeyValueChangeKey : Any]?)
}
同是不要忘记 deinit 的时候 removeObserver,防止 App 崩溃。对比 Apple 官方的 addObserver API 和 observeValue API,我们发现苹果还引入了一个参数context来更加灵活的处理通知观察机制。你可以定义不同的 context 并根据这些 context 来对属性变化做出处理。比如下面这样:
1
2
3
4
5
6
7
8
9
10
11
let myContext = UnsafePointer<()>()

observee.addObserver(observer, forKeyPath: …, options: nil, context: myContext)

override func observeValueForKeyPath(keyPath: String!, ofObject object: AnyObject!, change: [NSObject : AnyObject]!, context: UnsafePointer<()>) {
    if context == myContext {
        …
    } else {
        super.observeValueForKeyPath(keyPath, ofObject: object, change: change, context: context)
    }
}
总结
iOS 10中苹果的本地推送和远程推送 API 达到了高度统一,都使用 UserNotifications 这个框架来实现,学习曲线大幅下降。功能也得到了大幅度扩展,多媒体文件添加、扩展包、分类别响应、3D Touch 都使得推送功能更加灵活。
至于苹果自己设计的 KVO 和 NotificationCenter 机制,笔者认为有很大的局限性。因为对应的通知和相应代码段之间有一定距离,代码量很大的时候非常容易找不到对应的相应。同时这种观察者模式又难以测试,代码维护和质量很难得到保证。正是因为这些原因,响应式编程才日渐兴起,大家不妨去看看 RxSwift 和 ReactCocoa,其对应的 MVVM 架构也在系统解耦上要优于原生的 MVC。
参考
Introduction to User Notifications Framework in iOS 10
Push Notifications Tutorial: Getting Started
Send Push Notifications to iOS Devices using Xcode 8 and Swift 3