1.简介
CAReplicatorLayer能够创建出指定个数的子layer的复制layer,并且根据给出的位移、颜色等进行改变。可以用该图层做出很炫酷的动画效果。
2.属性
| 属性 | 内容 |
|---|---|
| instanceCount | 创建多少复制,默认: 1 |
| preservesDepth | ture为3D图层,false为2D图层 |
| instanceDelay | 复制的延时,用在动画时 |
| instanceTransform | 复制子图层时的产生位移,锚点是replicatorLayer的中心点 |
| instanceColor | 设置复制图层的颜色,默认白色 |
| instanceRedOffset | 设置复制图层相对上一个复制图层红色的偏移量 |
| instanceGreenOffset | 设置复制图层相对上一个复制图层绿色的偏移量 |
| instanceBlueOffset | 设置复制图层相对上一个复制图层蓝色的偏移量 |
| instanceAlphaOffset | 设置复制图层相对上一个复制图层透明度的偏移量 |
3.案例一: 加载进度
1
2
3
4
5
6
7
8
9
10
11
12
13
14
15
16
17
18
19
20
21
22
23
24
25
26
27
28
29
30
31
32
33
34
35
36
37
38
39
40
41
42
43
44
45
46
47
48
49
50
51
52
import UIKit
class ViewController: UIViewController {
    override func viewDidLoad() {
        super.viewDidLoad()
        setupLayer()
    }
  func setupLayer() {
	//创建
        let replicator = CAReplicatorLayer()
        replicator.frame = view.frame

        //设置复制图层个数
        replicator.instanceCount = 30
        //复制间隔
        replicator.instanceDelay = CFTimeInterval(1/30.0)
        //一般为false
        replicator.preservesDepth = false
        //图层颜色
        replicator.instanceColor = UIColor.white.cgColor

        //偏移量
        replicator.instanceRedOffset = 0
        replicator.instanceGreenOffset = -1
        replicator.instanceBlueOffset = -1
        replicator.instanceAlphaOffset = 0

        //角度
        let angle = CGFloat(M_PI*2.0)/30
        replicator.instanceTransform = CATransform3DMakeRotation(angle, 0, 0, 1)

        //子图层
        let instanceLayer = CALayer()
        let layerWidth: CGFloat = 10
        let X = view.bounds.midX - layerWidth/2
        let Y = view.bounds.midY - 100;
        instanceLayer.frame = CGRect(x: X, y: Y, width: layerWidth, height: layerWidth*3)
        instanceLayer.backgroundColor = UIColor.red.cgColor
        replicator.addSublayer(instanceLayer)

        //设置动画
        let fadeAnimation = CABasicAnimation(keyPath: "opacity")
        fadeAnimation.fromValue = 1
        fadeAnimation.toValue = 0
        fadeAnimation.duration = 1
        fadeAnimation.repeatCount = Float(Int.max)

        // 设置初始时为透明,并且添加动画
        instanceLayer.opacity = 0
        instanceLayer.add(fadeAnimation, forKey: "FadAnimation")
        view.layer.addSublayer(replicator)
    }
}
效果图:

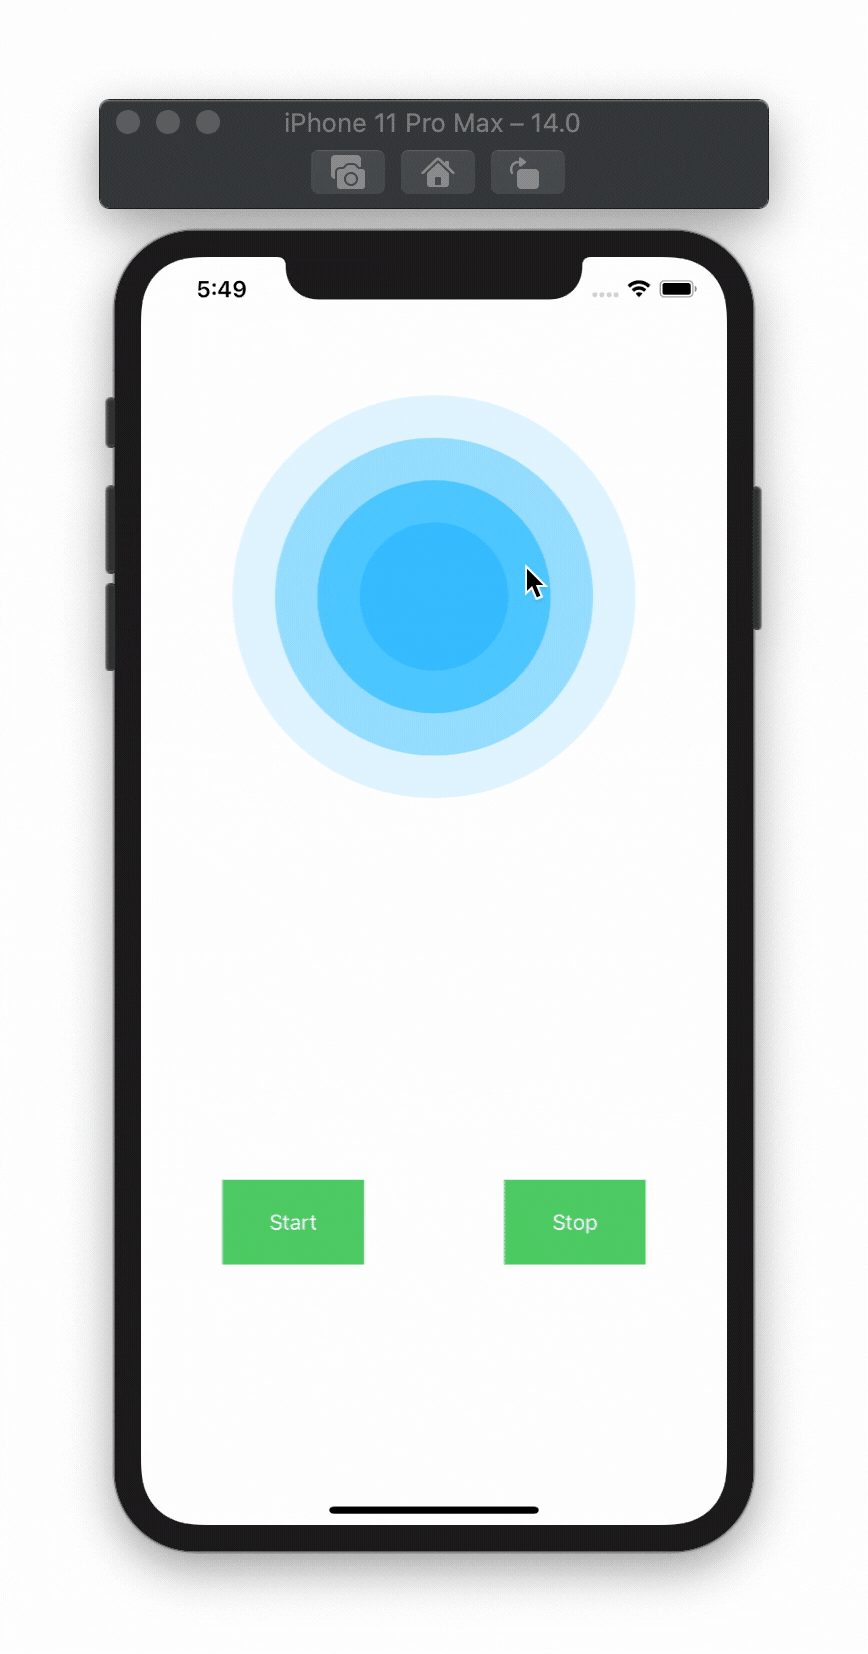
4.案例二: 水波纹
1
2
3
4
5
6
7
8
9
10
11
12
13
14
15
16
17
18
19
20
21
22
23
24
25
26
27
28
29
30
31
32
33
34
35
36
37
38
39
40
41
42
43
44
45
46
47
48
49
50
51
52
53
54
55
56
57
58
59
60
61
62
63
64
65
66
67
68
69
70
71
72
73
74
75
76
import UIKit

class ViewController: UIViewController {

    private let radarAnimation = "radarAnimation"
    private var animationLayer: CALayer?
    private let radarColor = UIColor(red: 0/255, green: 177/255, blue: 255/255, alpha: 1)
    private lazy var animationGroup = CAAnimationGroup()
    /// 图层数
    private let layerCount: CGFloat = 4.0

    override func viewDidLoad() {
        super.viewDidLoad()

        let radar = makeRadarAnimation(CGRect(x: (view.frame.size.width - 80) / 2, y: 200, width: 80, height: 80))
        view.layer.addSublayer(radar)
    }

    // 开始
    @IBAction func startAction(_ sender: UIButton) {
        animationLayer?.add(animationGroup, forKey: radarAnimation)
    }
    // 停止
    @IBAction func stopAction(_ sender: UIButton) {
        animationLayer?.removeAnimation(forKey: radarAnimation)
    }


    private func makeRadarAnimation(_ showRect: CGRect) -> CALayer {

        // 创建并返回一个新的Bézier路径对象,该对象在指定的矩形中具有一个内接的椭圆形路径。
        let bezierPath = UIBezierPath(ovalIn: CGRect(x: 0, y: 0, width: showRect.width, height: showRect.height))

        // 1. 一个动态波
        let shapeLayer = CAShapeLayer()
        shapeLayer.frame = showRect
        shapeLayer.path = bezierPath.cgPath
        shapeLayer.fillColor = radarColor.cgColor   // 填充椭圆路径颜色
        shapeLayer.opacity = 0.0                    // 默认初始颜色透明度
        animationLayer = shapeLayer

        // 2. 创建具有指定数量的子图层
        // 创建具有指定数量的子图层副本的图层,并具有不同的几何,时间和颜色转换。
        let replicator = CAReplicatorLayer()
        replicator.frame = shapeLayer.bounds
        replicator.instanceCount = Int(layerCount)              // 要创建的副本数,图层数
        replicator.instanceDelay = 1.0                          // 指定复制副本之间的延迟(以秒为单位)
        replicator.addSublayer(shapeLayer)

        // 3. 透明度
        let opacityAnimation = CABasicAnimation(keyPath: "opacity")
        opacityAnimation.fromValue = NSNumber(floatLiteral: 1.0)  // 开始透明度
        opacityAnimation.toValue = NSNumber(floatLiteral: 0)      // 结束时透明底

        // 4. 缩放
        let scaleAnimation = CABasicAnimation(keyPath: "transform")

        // 缩放起始大小
        scaleAnimation.fromValue = NSValue.init(caTransform3D: CATransform3DScale(CATransform3DIdentity, 1.0, 1.0, 0))

        // 缩放结束大小
        scaleAnimation.toValue = NSValue.init(caTransform3D: CATransform3DScale(CATransform3DIdentity, layerCount, layerCount, 0))

        // 5. 动画组
        animationGroup = CAAnimationGroup()
        animationGroup.animations = [opacityAnimation, scaleAnimation]
        animationGroup.duration = 4.0       // 动画执行时间
        animationGroup.repeatCount = HUGE   // 最大重复
        animationGroup.autoreverses = false

        shapeLayer.add(animationGroup, forKey: radarAnimation)

        return replicator
    }

}
效果图: