本文中我们将学习如何使用 SwiftUI 中的 Paths 和 AnimatableData 来制作颜色切换动画。


这些快速切换的动画是怎么实现的呢?让我们来看下文吧!
基础
要实现动画的关键是在 SwiftUI 中创建一个实现 Shape 协议的结构体。我们把它命名为 SplashShape。在 Shape 协议中,有一个方法叫做 path(in rect: CGRect) -> Path,这个方法可以用来设置图形的外观。我们就用这个方法来实现本文中的各种动画。
创建 SplashShape 结构体
下面我们创建一个叫做 SplashStruct 的结构体,它继承于 Shape 协议。
1
2
3
4
5
6
7
8
import SwiftUI

struct SplashShape: Shape {

    func path(in rect: CGRect) -> Path {
        return Path()
    }
}
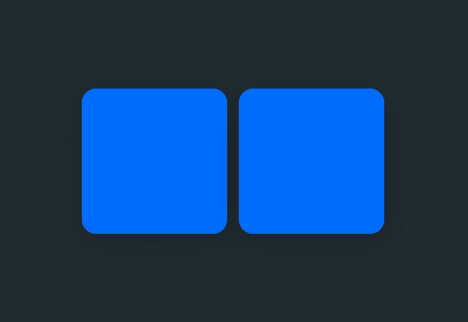
我们首先创建两种动画类型:leftToRight 和 rightToLeft,效果如下所示:
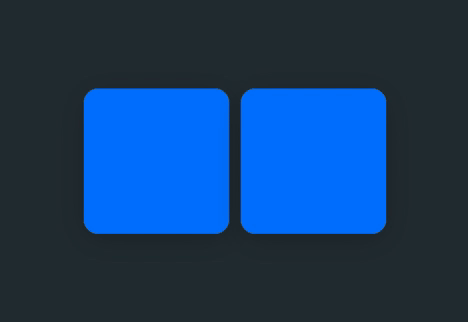
Splash 动画
我们创建一个名为 SplashAnimation 的枚举来定义动画类型,便于以后更方便地扩展新动画(文章末尾可以验证!)。
1
2
3
4
5
6
7
8
9
10
11
12
13
import SwiftUI

struct SplashShape: Shape {

    public enum SplashAnimation {
        case leftToRight
        case rightToleft
    }

    func path(in rect: CGRect) -> Path {
        return Path()
    }
}
在 path() 方法中,我们可以选择需要使用的动画,并且返回动画的 Path。但是首先,我们必须创建变量来存储动画类型,记录动画过程。
1
2
3
4
5
6
7
8
9
10
11
12
13
14
15
16
import SwiftUI

struct SplashShape: Shape {

    public enum SplashAnimation {
        case leftToRight
        case rightToleft
    }

    var progress: CGFloat
    var animationType: SplashAnimation

    func path(in rect: CGRect) -> Path {
        return Path()
    }
}
progress 的取值范围在 0 和 1 之间,它代表整个动画的完成进度。当我们编写 path() 方法时,它就会派上用场。
编写 path() 方法
跟之前说的一样,为了返回正确的 Path,我们需要明确正在使用哪一种动画。在 path() 方法中编写 switch 语句,并且用上我们之前定义的 animationType。
1
2
3
4
5
6
7
8
func path(in rect: CGRect) -> Path {
   switch animationType {
       case .leftToRight:
           return Path()
       case .rightToLeft:
           return Path()
   }
}
现在这个方法只会返回空 paths。我们需要创建产生真实动画的方法。
实现动画方法
在 path() 方法的下面,创建两个新的方法:leftToRight() 和 rightToLeft(),每个方法表示一种动画类型。在每个方法体内,我们会创建一个矩形形状的 Path,它会根据 progress 变量的值随时间发生变换。
1
2
3
4
5
6
7
8
9
10
11
12
13
14
15
16
17
18
19
func leftToRight(rect: CGRect) -> Path {
    var path = Path()
    path.move(to: CGPoint(x: 0, y: 0)) // Top Left
    path.addLine(to: CGPoint(x: rect.width * progress, y: 0)) // Top Right
    path.addLine(to: CGPoint(x: rect.width * progress, y: rect.height)) // Bottom Right
    path.addLine(to: CGPoint(x: 0, y: rect.height)) // Bottom Left
    path.closeSubpath() // Close the Path
    return path
}

func rightToLeft(rect: CGRect) -> Path {
    var path = Path()
    path.move(to: CGPoint(x: rect.width, y: 0))
    path.addLine(to: CGPoint(x: rect.width - (rect.width * progress), y: 0))
    path.addLine(to: CGPoint(x: rect.width - (rect.width * progress), y: rect.height))
    path.addLine(to: CGPoint(x: rect.width, y: rect.height))
    path.closeSubpath()
    return path
}
然后在 path() 方法中调用上面两个新方法。
1
2
3
4
5
6
7
8
func path(in rect: CGRect) -> Path {
   switch animationType {
       case .leftToRight:
           return leftToRight(rect: rect)
       case .rightToLeft:
           return rightToLeft(rect: rect)
   }
}
动画数据
为了确保 Swift 知道在更改 progress 变量时如何对 Shape 进行动画处理,我们需要指定一个响应动画的变量。在 progress 和 animationType 变量下面,定义 animatableData。这是一个基于Animatable 协议 的变量,它可以通知 SwiftUI 在数据改变时,对视图进行动画处理。
1
2
3
4
5
6
7
var progress: CGFloat
var animationType: SplashAnimation

var animatableData: CGFloat {
    get { return progress }
    set { self.progress = newValue}
}

颜色切换时产生动画
到目前为止,我们已经创建了一个 Shape,它将随着时间的变化而变化。接下来,我们需要将它添加到视图中,并在视图颜色改变时自动对其进行动画处理。这时候我们引入 SplashView。我们将创建一个 SplashView 来自动更新 SplashShape 的 progress 变量。当 SplashView 接收到新的 Color 时,它将触发动画。
首先,我们创建 SplashView 结构体。
1
2
3
4
5
6
7
8
9
import SwiftUI

struct SplashView: View {

    var body: some View {
        // SplashShape Here
    }

}
SplashShape 需要使用 SplashAnimation 枚举作为参数,所以我们会把它作为参数传递给 SplashView。另外,我们要在视图的背景颜色变化时设置动画,所以我们也要传递 Color 参数。这些细节会在我们的初始化方法中详细说明。
ColorStore 是自定义的 ObservableObject。它用来监听 SplashView 结构体中 Color 值的改变,以便我们可以初始化 SplashShape 动画,并最终改变背景颜色。我们稍后展示它的工作原理。
1
2
3
4
5
6
7
8
9
10
11
12
13
14
15
16
17
18
19
20
21
22
23
24
25
26
struct SplashView: View {

    var animationType: SplashShape.SplashAnimation
    @State private var prevColor: Color // Stores background color
    @ObservedObject var colorStore: ColorStore // Send new color updates


    init(animationType: SplashShape.SplashAnimation, color: Color) {
        self.animationType = animationType
        self._prevColor = State<Color>(initialValue: color)
        self.colorStore = ColorStore(color: color)
    }

    var body: some View {
        // SplashShape Here
    }

}

class ColorStore: ObservableObject {
    @Published var color: Color

    init(color: Color) {
        self.color = color
    }
}
构建 SplashView body
在 body 内部,我们需要返回一个 Rectangle,它和 SplashView 当前的颜色保持一致。然后使用之前定义的 ColorStore,以便于我们接收更新的颜色值来驱动动画。
1
2
3
4
5
6
7
var body: some View {
    Rectangle()
        .foregroundColor(self.prevColor) // Current Color
        .onReceive(self.colorStore.$color) { color in
            // Animate Color Update Here
        }
}
当颜色改变时,我们需要记录 SplashView 中正在改变的颜色和进度。为此,我们定义 layers 变量。
1
@State var layers: [(Color,CGFloat)] = [] // New Color & Progress
现在回到 body 变量内部,我们给 layers 变量添加新接收的 Colors 。添加的时候我们把进度设置为 0。然后,在半秒之内的动画过程中,我们把进度设置为 1。
1
2
3
4
5
6
7
8
9
10
11
12
var body: some View {
    Rectangle()
        .foregroundColor(self.prevColor) // Current Color
        .onReceive(self.colorStore.$color) { color in
            // Animate Color Update Here
            self.layers.append((color, 0))

            withAnimation(.easeInOut(duration: 0.5)) {
                self.layers[self.layers.count-1].1 = 1.0
            }
        }
}
现在在这段代码中,layers 变量中添加了更新后的颜色,但是颜色并没有展示出来。为了展示颜色,我们需要在 body 变量内部为 Rectangle 的每一个图层添加一个覆盖层。
1
2
3
4
5
6
7
8
9
10
11
12
13
14
15
16
17
18
19
20
21
22
var body: some View {
    Rectangle()
        .foregroundColor(self.prevColor)
        .overlay(
            ZStack {
                ForEach(layers.indices, id: \.self) { x in
                    SplashShape(progress: self.layers[x].1, animationType: self.animationType)
                        .foregroundColor(self.layers[x].0)
                }

            }

            , alignment: .leading)
        .onReceive(self.colorStore.$color) { color in
            // Animate color update here
            self.layers.append((color, 0))

            withAnimation(.easeInOut(duration: 0.5)) {
                self.layers[self.layers.count-1].1 = 1.0
            }
        }
}
测试效果
你可以在模拟器中运行下面的代码。这段代码的意思是,当你点击 ContentView 中的按钮时,它会计算 index 来选择 SplashView 中的颜色,同时也会触发 ColorStore 内部的更新。所以,当 SplashShape 图层添加到 SplashView 时,就会触发动画。
1
2
3
4
5
6
7
8
9
10
11
12
13
14
15
16
17
18
19
20
21
22
23
24
25
import SwiftUI

struct ContentView: View {
    var colors: [Color] = [.blue, .red, .green, .orange]
    @State var index: Int = 0

    @State var progress: CGFloat = 0
    var body: some View {
        VStack {

            SplashView(animationType: .leftToRight, color: self.colors[self.index])
                .frame(width: 200, height: 100, alignment: .center)
                .cornerRadius(10)
                .shadow(color: Color.black.opacity(0.2), radius: 10, x: 0, y: 4)

            Button(action: {
                self.index = (self.index + 1) % self.colors.count
            }) {
                Text("Change Color")
            }
            .padding(.top, 20)
        }

    }
}

还没有完成!
我们还有一个功能没实现。现在我们持续地把图层添加到 SplashView 上,但是没有删除它们。因此,我们需要在动画完成时把这些图层清理掉。
在 SplashView 结构体 body 变量的 onReceive() 方法内部,做如下改变:
1
2
3
4
5
6
7
8
9
10
11
.onReceive(self.colorStore.$color) { color in
    self.layers.append((color, 0))

    withAnimation(.easeInOut(duration: 0.5)) {
        self.layers[self.layers.count-1].1 = 1.0
        DispatchQueue.main.asyncAfter(deadline: .now() + 0.5) {
            self.prevColor = self.layers[0].0 // Finalizes background color of SplashView
            self.layers.remove(at: 0) // removes itself from layers array
        }
    }
}
这行代码能让我们删除 layers 数组中使用过的值,并确保 SplashView 基于最新更新的值显示正确的背景色。

彩蛋!
如果你熟悉我之前的教程,你应该了解我喜欢彩蛋 😉。在本文开头,我说过会实现更多动画。此刻终于来了…… 击鼓……。
Splash 动画 🥳
哈哈哈!!还记得吗?我说过会添加更多动画种类。
1
2
3
4
5
6
7
8
9
10
11
12
13
14
15
16
17
18
19
20
21
22
23
24
25
26
27
enum SplashAnimation {
    case leftToRight
    case rightToLeft
    case topToBottom
    case bottomToTop
    case angle(Angle)
    case circle
}

func path(in rect: CGRect) -> Path {

    switch self.animationType {
        case .leftToRight:
            return leftToRight(rect: rect)
        case .rightToLeft:
            return rightToLeft(rect: rect)
        case .topToBottom:
            return topToBottom(rect: rect)
        case .bottomToTop:
            return bottomToTop(rect: rect)
        case .angle(let splashAngle):
            return angle(rect: rect, angle: splashAngle)
        case .circle:
            return circle(rect: rect)
    }

}
你肯定会想…… “哇, 彩蛋也太多了……”。不必苦恼。我们只需要在 SplashShape 的 path() 方法中添加几个方法,就能搞定。
下面我们逐个动画来搞定……
topToBottom 和 bottomToTop 动画
这些方法与 leftToRight 和 rightToLeft 非常相似,它们从 shape 的底部或顶部开始创建 path ,并使用 progress 变量随时间对其进行变换。
1
2
3
4
5
6
7
8
9
10
11
12
13
14
15
16
17
18
19
func topToBottom(rect: CGRect) -> Path {
    var path = Path()
    path.move(to: CGPoint(x: 0, y: 0))
    path.addLine(to: CGPoint(x: rect.width, y: 0))
    path.addLine(to: CGPoint(x: rect.width, y: rect.height * progress))
    path.addLine(to: CGPoint(x: 0, y: rect.height * progress))
    path.closeSubpath()
    return path
}

func bottomToTop(rect: CGRect) -> Path {
    var path = Path()
    path.move(to: CGPoint(x: 0, y: rect.height))
    path.addLine(to: CGPoint(x: rect.width, y: rect.height))
    path.addLine(to: CGPoint(x: rect.width, y: rect.height - (rect.height * progress)))
    path.addLine(to: CGPoint(x: 0, y: rect.height - (rect.height * progress)))
    path.closeSubpath()
    return path
}
circle 动画
如果你还记得小学几何知识,就应该了解勾股定理。a^2 + b^2 = c^2
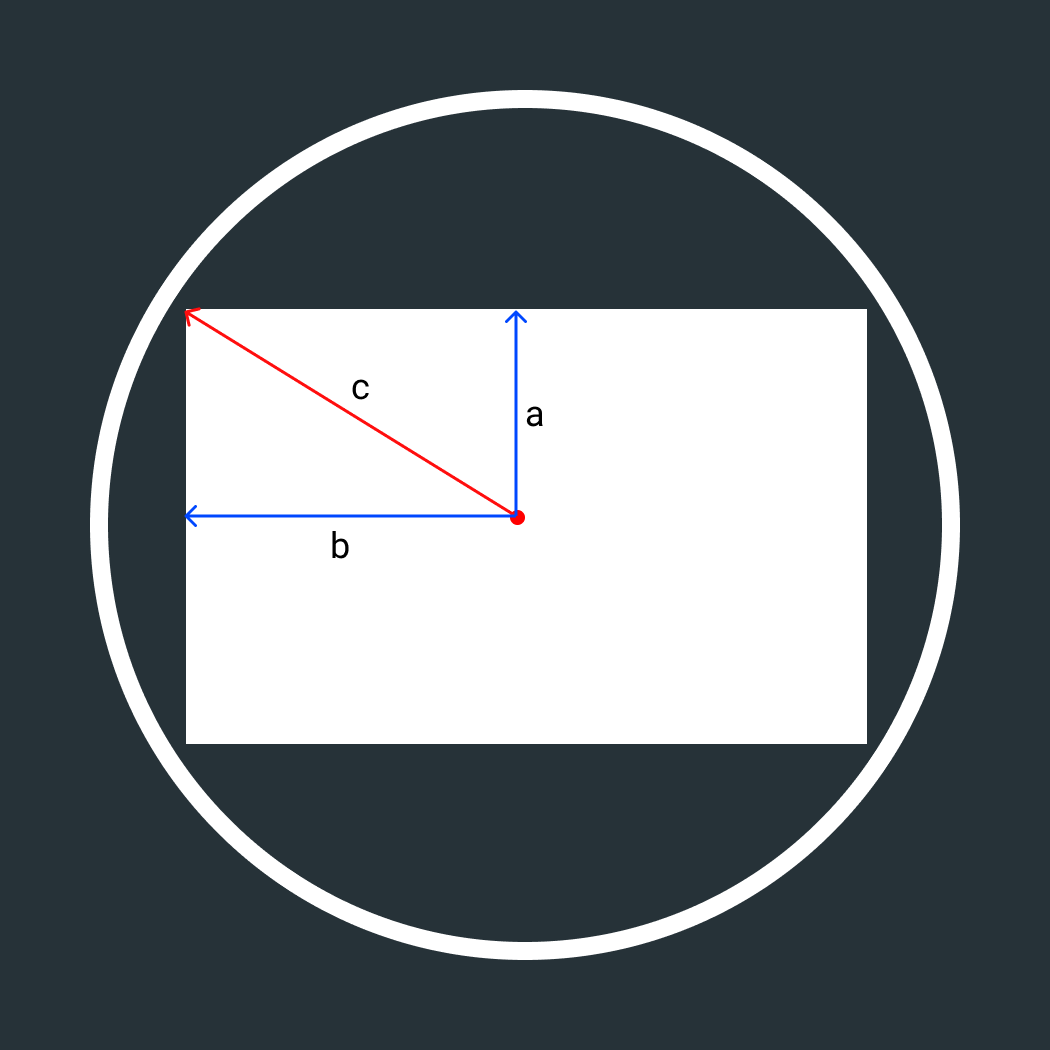
a 和 b 可以视为矩形的 高度 和 宽度,我们能够根据它们求得 c,即覆盖整个矩形所需的圆的半径。我们以此为基础构建圆的 path,并使用 progress 变量随时间对它进行变换。
1
2
3
4
5
6
7
8
9
10
11
12
13
14
func circle(rect: CGRect) -> Path {
    let a: CGFloat = rect.height / 2.0
    let b: CGFloat = rect.width / 2.0

    let c = pow(pow(a, 2) + pow(b, 2), 0.5) // a^2 + b^2 = c^2  --> Solved for 'c'
    // c = radius of final circle

    let radius = c * progress
    // Build Circle Path
    var path = Path()
    path.addArc(center: CGPoint(x: rect.midX, y: rect.midY), radius: radius, startAngle: Angle(degrees: 0), endAngle: Angle(degrees: 360), clockwise: true)
    return path

}
angle 动画
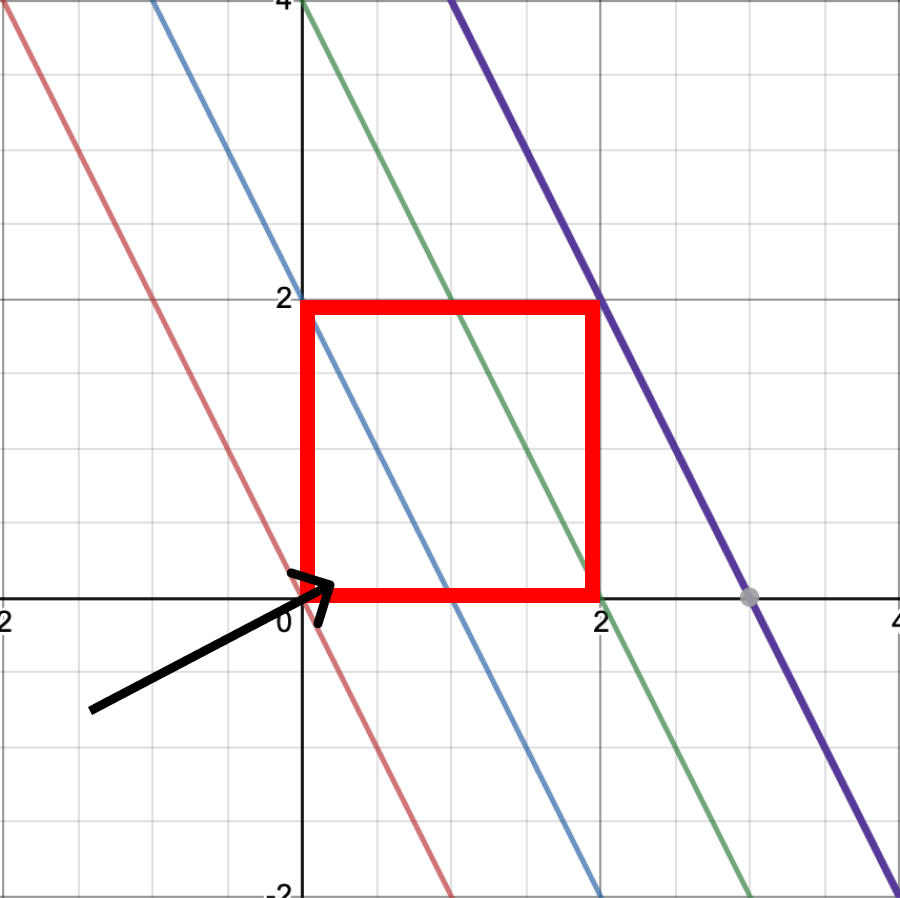
这个动画知识点有点多。你需要使用切线计算角度的斜率,然后根据这个斜率创建一条直线。在矩形上移动这条直线时,根据它来绘制一个直角三角形。参见下图,各种彩色的线表示该线随时间移动时,覆盖整个矩形的状态。
方法如下:
1
2
3
4
5
6
7
8
9
10
11
12
13
14
15
16
17
18
19
20
21
22
23
24
25
26
27
28
29
30
31
32
33
34
35
36
37
38
39
40
41
42
43
func angle(rect: CGRect, angle: Angle) -> Path {

    var cAngle = Angle(degrees: angle.degrees.truncatingRemainder(dividingBy: 90))

    // Return Path Using Other Animations (topToBottom, leftToRight, etc) if angle is 0, 90, 180, 270
    if angle.degrees == 0 || cAngle.degrees == 0 { return leftToRight(rect: rect)}
    else if angle.degrees == 90 || cAngle.degrees == 90 { return topToBottom(rect: rect)}
    else if angle.degrees == 180 || cAngle.degrees == 180 { return rightToLeft(rect: rect)}
    else if angle.degrees == 270 || cAngle.degrees == 270 { return bottomToTop(rect: rect)}


    // Calculate Slope of Line and inverse slope
    let m = CGFloat(tan(cAngle.radians))
    let m_1 = pow(m, -1) * -1
    let h = rect.height
    let w = rect.width

    // tan (angle) = slope of line
    // y = mx + b ---> b = y - mx   ~ 'b' = y intercept
    let b = h - (m_1 * w) // b = y - (m * x)

    // X and Y coordinate calculation
    var x = b * m * progress
    var y = b * progress

    // Triangle Offset Calculation
    let xOffset = (angle.degrees > 90 && angle.degrees < 270) ? rect.width : 0
    let yOffset = (angle.degrees > 180 && angle.degrees < 360) ? rect.height : 0

    // Modify which side the triangle is drawn from depending on the angle
    if angle.degrees > 90 && angle.degrees < 180 { x *= -1 }
    else if angle.degrees > 180 && angle.degrees < 270 { x *= -1; y *= -1 }
    else if angle.degrees > 270 && angle.degrees < 360 { y *= -1 }

    // Build Triangle Path
    var path = Path()
    path.move(to: CGPoint(x: xOffset, y: yOffset))
    path.addLine(to: CGPoint(x: xOffset + x, y: yOffset))
    path.addLine(to: CGPoint(x: xOffset, y: yOffset + y))
    path.closeSubpath()
    return path

}
